One of the exciting new additions to the WatchKit Framework in watchOS 2 is the ability to add custom complications to the clock faces provided by Apple. We've written a quick guide on how to add custom Complications to your watch app.
Implement CLKComplicationDataSource
All of the magic happens in CLKComplicationDataSource. Create a new class on your WatchKit Extension target that implements this delegate. Since every delegate method is required, we can start by adding the skeleton of every method in the delegate.
import ClockKit

class Cowmplication: NSObject, CLKComplicationDataSource {

    func getNextRequestedUpdateDateWithHandler(handler: (NSDate?) -> Void) {
        handler(nil)
    }

    func getPlaceholderTemplateForComplication(complication: CLKComplication, withHandler handler: (CLKComplicationTemplate?) -> Void) {
        handler(nil)
    }

    func getPrivacyBehaviorForComplication(complication: CLKComplication, withHandler handler: (CLKComplicationPrivacyBehavior) -> Void) {
        handler(CLKComplicationPrivacyBehavior.ShowOnLockScreen)
    }

    func getCurrentTimelineEntryForComplication(complication: CLKComplication, withHandler handler: (CLKComplicationTimelineEntry?) -> Void) {
        handler(nil)
    }

    func getTimelineEntriesForComplication(complication: CLKComplication, beforeDate date: NSDate, limit: Int, withHandler handler: ([CLKComplicationTimelineEntry]?) -> Void) {
        handler(nil)
    }

    func getTimelineEntriesForComplication(complication: CLKComplication, afterDate date: NSDate, limit: Int, withHandler handler: ([CLKComplicationTimelineEntry]?) -> Void) {
        handler([])
    }

    func getSupportedTimeTravelDirectionsForComplication(complication: CLKComplication, withHandler handler: (CLKComplicationTimeTravelDirections) -> Void) {
        handler([CLKComplicationTimeTravelDirections.None])
    }

    func getTimelineStartDateForComplication(complication: CLKComplication, withHandler handler: (NSDate?) -> Void) {
        handler(NSDate())
    }

    func getTimelineEndDateForComplication(complication: CLKComplication, withHandler handler: (NSDate?) -> Void) {
        handler(NSDate())
    }
}
You never need to create an instance of this class, and Apple will handle instantiating it using the default constructor.
Understanding Complication Families
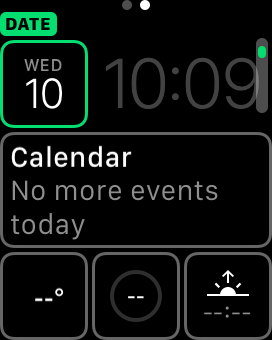
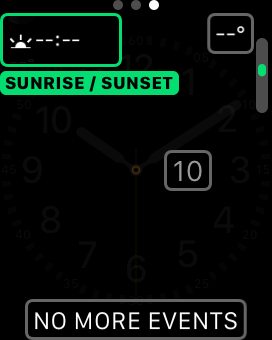
There are 5 families of complications that we need to become familiar with in the CLKComplicationFamily enum. From left to right, here are images of ModularSmall, ModularLarge, UtilitarianSmall, UtilitarianLarge, CircularSmall.


From within these families, to populate data, you implement different complication templates related to each family. For example, CLKComplicationFamily.CircularSmall can use the following templates:
CLKComplicationTemplateCircularSmallRingTextCLKComplicationTemplateCircularSmallRingImageCLKComplicationTemplateCircularSmallStackTextCLKComplicationTemplateCircularSmallStackImage
There are many templates available. Take a look at the list of subclasses to CLKComplicationTemplate in the ClockKit Framework Reference to see all of the options. Clicking in on a template you can see Apple's visual diagram of how the information in each template is presented.
Configure Info.plist
Go to your targets and select your WatchKit Extension target. Under the General tab, set the Data Source Class to the class delegate we created above prefixed with $(PRODUCT_MODULE_NAME). For example, since our example class was Cowmplication, we put $(PRODUCT_MODULE_NAME).Cowmplication for Data Source Class.
Next, check off which complication families you want to support. Most likely you'd want to support all families, but we're just going to implement CircularSmall for this example.

Set Privacy Behavior
You can choose to show or hide your complication data if the watch is locked, especially if you are displaying more private or sensitive information by passing either CLKComplicationPrivacyBehavior.ShowOnLockScreen or CLKComplicationPrivacyBehavior.HideOnLockScreen to the handler of getPrivacyBehaviorForComplication().
    func getPrivacyBehaviorForComplication(complication: CLKComplication, withHandler handler: (CLKComplicationPrivacyBehavior) -> Void) {
        handler(CLKComplicationPrivacyBehavior.ShowOnLockScreen)
    }
Set Refresh Frequency
Implement getNextRequestedUpdateDateWithHandler() delegate method to tell the watch how often to refresh the complication data. Apple recommends choosing hourly or even an entire day, and providing as much information as possible in a single update cycle with your complication. This will avoid unnecessary battery life drains.
The API gives you a handler you need to call, passing in the date of the next update.
    func getNextRequestedUpdateDateWithHandler(handler: (NSDate?) -> Void) {
        // Update hourly
        handler(NSDate(timeIntervalSinceNow: 60*60))
    }
Implement Placeholder Templates
If data is not populated, especially when customizing the clock face, the OS will show a placeholder for your complication.
You set this up with the getPlaceholderTemplateForComplication() delegate method. It's important to know that this method is called only once, during the installation of your app and the placeholder is cached, so you won't be able to customize this later on.
    func getPlaceholderTemplateForComplication(complication: CLKComplication, withHandler handler: (CLKComplicationTemplate?) -> Void) {
        var template: CLKComplicationTemplate? = nil
        switch complication.family {
        case .ModularSmall:
            template = nil
        case .ModularLarge:
            template = nil
        case .UtilitarianSmall:
            template = nil
        case .UtilitarianLarge:
            template = nil
        case .CircularSmall:
            let modularTemplate = CLKComplicationTemplateCircularSmallRingText()
            modularTemplate.textProvider = CLKSimpleTextProvider(text: "--")
            modularTemplate.fillFraction = 0.7
            modularTemplate.ringStyle = CLKComplicationRingStyle.Closed
            template = modularTemplate
        }
        handler(template)
    }
In this example code, we've only implemented the delegate method for .CircularSmall, but in your apps, you'd likely want to configure the look for most or all of the complication types.
For the placeholder, you are not supposed to populate with example data, which is why we put "--" for the text, following what Apple's stock complications do when they put their own placeholders.
Populate Your Complication With Real Data
Next, we'll actually implement the delegate method that will provide real data for the complication. Again, while in the code snippet we only implement .CircularSmall, you would build multiple templates for all of the different complication families you support.
    func getCurrentTimelineEntryForComplication(complication: CLKComplication, withHandler handler: (CLKComplicationTimelineEntry?) -> Void) {

        if complication.family == .CircularSmall {
            let template = CLKComplicationTemplateCircularSmallRingText()
            template.textProvider = CLKSimpleTextProvider(text: "\(getCurrentHealth())")
            template.fillFraction = Float(getCurrentHealth()) / 10.0
            template.ringStyle = CLKComplicationRingStyle.Closed

            let timelineEntry = CLKComplicationTimelineEntry(date: NSDate(), complicationTemplate: template)
            handler(timelineEntry)
        } else {
            handler(nil)
        }
    }
This introduces the concept of a CLKComplicationTimelineEntry, which is a container that pairs a date with a complication template. getCurrentTimelineEntryForComplication is used to populate the current complication data, which is why we use NSDate() to indicate the current date and time.
Refreshing The Complication From Your App
It's a very common scenario that while the user is using your app, you'll want to update your complication as you know the data is stale or incorrect. You can use the CLKComplicationServer singleton to trigger updates to your complications.
        let complicationServer = CLKComplicationServer.sharedInstance()
        for complication in complicationServer.activeComplications {
            complicationServer.reloadTimelineForComplication(complication)
        }
Apple has indicated that reloadTimelineForComplication() is rate limited to preserve battery life. If a complication exceeds a daily limit, it will ignore calls to refresh for the remainder of that day.
Build, Run & Test

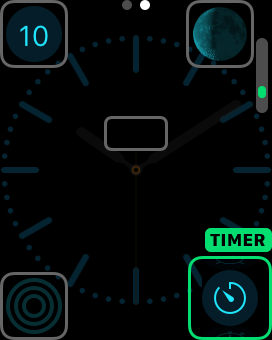
The completed Complication.
If you didn't make any typos, you should be able to now test & run this on the simulator or on a device. If you are having trouble finding it, make sure that you are looking for it on the right clock face, since not all clock faces support all families of complications.
Time Travel
Improving the code to implement Time Travel is relatively straightforward. First, update getSupportedTimeTravelDirectionsForComplication() to indicate if your complication supports values into the future or the past. For example, a stocks complication would only make sense to show values in the past, while a weather complication could show values in the past and the future.
    func getSupportedTimeTravelDirectionsForComplication(complication: CLKComplication, withHandler handler: (CLKComplicationTimeTravelDirections) -> Void) {
        handler([.Backward, .Forward])
    }
Next, implement getTimelineEntriesForComplication(complication:beforeDate:limit:withHandler:) and getTimelineEntriesForComplication(complication:afterDate:limit:withHandler:) which is similar to getCurrentTimelineEntryForComplication() except that you pass in an array of CLKComplicationTimelineEntry objects. Don't return more objects than limit, and make sure your dates are in sequential order and all occur before or after the passed in dates.
Finally, implement getTimelineStartDateForComplication() and getTimelineEndDateForComplication() to indicate the ranges of time travel you support.
Wrapping Up
You can check out the completed project code on our Sneaky Crab GitHub so you can quickly get going.
Apple has provided a very simple and powerful API to convey simple, glance-able information right on the clock face for app developers.
Tell us about the cool complications that you come up with in the comment section below!
Update 6/22/15: watchOS 2 beta 2 bugs
If you're having trouble with Complications when using beta 2, be aware of the known issues and workarounds from the watchOS 2 Release Notes from Apple.
Known Issues
Complications are disabled across launches of Simulator.
Workaround: After enabling a complication in the Watch Simulator you need to lock the watch sim, using Sim Menu > Hardware > Lock (or Command-L), to have the complication still be enabled after quitting Simulator and relaunching.Location request dialog text is jumbled in Simulator.
CLKImageProviderobjects do not currently honor theforegroundImageproperty.- The
CLKComplicationRingStyleproperty is currently not honored on anyCLKComplicationTemplate. - The
CLKRelativeDateStyleOffsetenumeration ofCLKRelativeDateStyleis not honored for use inCLKRelativeDateTextProvider: It appears asCLKRelativeDateStyleNatural. - The
CLKComplicationPrivacyBehavioronCLKComplicationDataSourceis not currently honored.